Attaching Additional Files to a Single Assignment
Most of your assignments just have one slot for attaching a single document. But occasionally, if you have a particularly big one (or there are two different media used, such as Powerpoint and Word), you may want to break it into a couple of documents.
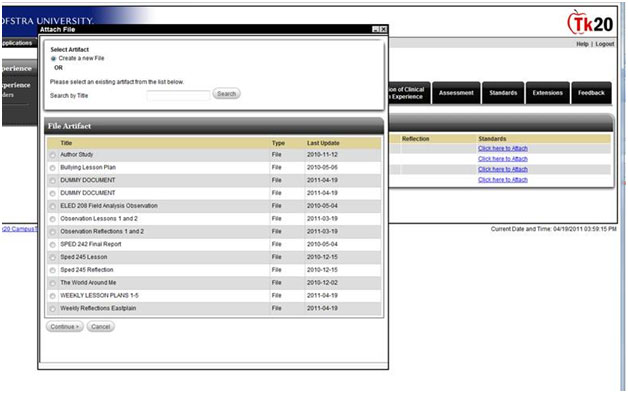
When you click on “click here to attach” or you click on the Artifact Wizard, Tk20 will bring up the window that asks if you want to create a new file or choose an existing one. The default radio button is “create a new file,” which means that you have not yet uploaded it to your Tk20 account:

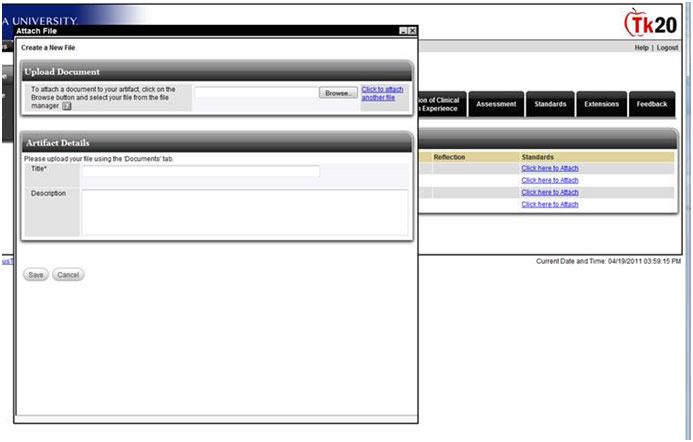
At the bottom of that screen (you may need to drag out the bottom right edge a bit), you will click CONTINUE, and that brings you to the following screen:

And here’s the tricky part. If you know you are going to be uploading several documents, do your browse of your hard drive/flash drive/etc., click on the first document you want to upload, wait until its name shows up in the title box, but then do NOT click Save. Instead, click on that little blue area to the right of Browse where it says “click here to attach another file”. Keep using that until you are done and THEN click Save. It’s important to click SAVE at the end of the series of documents you are uploading. Otherwise, those documents will disappear after you log out and then log in again. They may still be under your artifacts tab, but you will need to re-attach them to your assignment.
The entire submission will show up as the title of the first document you uploaded, but when your professor goes into the document (see below), it will have the various sub-documents attached.
